| Table of Contents |
|---|
...
...
...
...
visage|SDK is implemented in C++ and provides C++ API which cannot be used directly in Swift without first wrapping C++ API in an NSObject and exposing it to Swift through bridging-header. Wrapping in an NSObject does not have to be one-on-one mapping with C++ classes. Instead, it can be a higher level mapping and fragments of source code from provided iOS sample projects can be used as building blocks.
A general example of how this technique is usually implemented can be found here:
https://stackoverflow.com/questions/48971931/bridging-c-code-into-my-swift-code-what-file-extensions-go-to-which-c-based-l
A way without wrapping NSObject is by wrapping C++ API in C-interface functions and exposing them through bridging-header. An example of such a wrapper is provided in visage|SDK in the form of VisageTrackerUnityPlugin which provides simpler, high-level API through a C-interface.
A general example of how this technique is usually implemented can be found here:
https://www.swiftprogrammer.info/swift_call_cpp.html
Can I use visage|SDK in WebView (in iOS and Android)?
We believe that it should be possible to use visage|SDK in WebView, but we have not tried that nor have any clients currently who have done that so we cannot guarantee it. The performance will almost certainly be lower than with a native app.
Is there visage|SDK for Raspberry PI?
visage|SDK 8.4 for rPI can be downloaded from the following link: https://www.visagetechnologies.com/downloads/visageSDK-rPI-linux_v8.4.tar.bz2
Once you unpack it, you will find the documentation in the root folder. It will guide you through the API and the available sample projects.
Important notes:
Because of very low demand we currently provide visage|SDK for rPI on-demand only.
The package you have received is visage|SDK 8.4. The latest release is visage|SDK 8.7 but that is not available for rPI yet. If your initial tests prove interesting, we will need to discuss the possibility to build the latest version on-demand for you. visage|SDK 8.7 provides better performance and accuracy, but the API is mostly unchanged so you can run relevant initial tests.
visage|SDK 8.4 for rPI has been tested with rPI3b+; it should work with rPI4 but we have not tested that.
Will visage|SDK for HTML5 work in browsers on smartphones?
The HTML5 demo page contains the list of supported browsers: https://visagetechnologies.com/demo/#supported-browsers
Please note that the current HTML5 demos have not been optimized for use in mobile browsers. Therefore, for the best results, it is recommended to use a desktop browser.
On iOS, the HTML5 demos work in Safari browser version 14 and higher. They do not work in Chrome and Firefox browsers due to limitations on camera access.
(https://stackoverflow.com/questions/59190472/webrtc-in-chrome-ios)
Which browsers does visage|SDK for HTML5 support?
The HTML5 demo page contains the list of supported browsers: https://visagetechnologies.com/demo/#supported-browsers
Please note that the current HTML5 demos have not been optimized for use in mobile browsers. Therefore, for the best results, it is recommended to use a desktop browser.
...
...
...
...
...
...
...
...
...
...
...
How far from a camera can a face be recognized?
This depends on camera resolution. Face Recognition works best when the size of the face in the image is at least 100 pixels.
| Info |
|---|
See also: |
High-level functionalities
How do I perform liveness detection with visage|SDK?
visage|SDK includes active liveness detection. The user is required to perform a simple facial gesture (smile, blink, or raise eyebrows). Face tracking is then used to verify that the gesture is actually performed. You can configure which gesture(s) you want to include. As the app developer, you also need to take care of displaying appropriate messages to the user.
All visage|SDK packages include the API for liveness detection. However, only the visage|SDK for Windows and visage|SDK for Android contains a ready-to-run demo of Liveness Detection. So, for a quick test of the liveness detection function, it would probably be the easiest to download visage|SDK for Windows, run “DEMO_FaceTracker2.exe” and select “Perform Liveness” from the Liveness menu.
The technical demos in Android and Windows packages of visage|SDK include the source code intended to help you integrate liveness detection into your own application.
| Info |
|---|
See also: |
How do I perform identification of a person from a database?
This article outlines the implementation of using face recognition for identifying a person from a database of known people. It may be applied to cases such as whitelists for access control or attendance management, blacklists for alerts, and similar. The main processes involved in implementing this scenario are registration and matching, as follows.
Registration
Assuming that you have an image and an ID (name, number or similar) for each person, you register each person by storing their face descriptor into a gallery (database). For each person, the process is as follows:
Locate the face in the image:
To locate the face, you can use detection (for a single image) or tracking (for a series of images from a camera feed).
See function VisageTracker::track() or VisageFeaturesDetector::detectFacialFeatures().
Each of these functions returns the number of faces in the image - if there is not exactly one face, you may report an error or take other actions.
Furthermore, these functions return the FaceData structure for each detected face, containing the face location.
Use VisageFaceRecognition::addDescriptor() to get the face descriptor and add it to the gallery of known faces together with the name or ID of the person.
The descriptor is an array of short integers that describes the face - similar faces will have similar descriptors.
The gallery is simply a database of face descriptors, each with an attached ID.
Note that you could store the descriptors in your own database, without using the provided gallery implementation.
Save the gallery using VisageFaceRecognition::saveGallery().
Matching
At this stage, you match a new facial image (for example, a person arriving at a gate, reception, control point or similar) against the previously stored gallery, and obtain IDs of one or more most similar persons registered in the gallery.
First, locate the face(s) in the new image.
The steps are the same as explained above in the Registration part. You obtain a FaceData structure for each located face.
Pass the FaceData to VisageFaceRecognition::extractDescriptor() to get the face descriptor of the person.
Pass this descriptor to VisageFaceRecognition::recognize(), which will match it to all the descriptors you have previously stored in the gallery and return the name/ID of the most similar person (or the desired number of most similar persons);
the Recognize() function also returns a similarity value, which you may use to cut off the false positives.
| Info | ||
|---|---|---|
| ||
See also: |
How do I perform verification of a live face vs. an ID photo?
The scenario is the verification of a live face image against the image of a face from an ID. This is done in four main steps:
Locate the face in each of the two images;
Extract the face descriptor from each of the two faces;
Compare the two descriptors to obtain the similarity value;
Compare the similarity value to a chosen threshold, resulting in a match or non-match.
These steps are described here with further detail:
In each of the two images (live face and ID image), the face first needs to be located:
...
...
...
...
...
Note: the ID image should be cropped so that the ID is occupying most of the image (if the face on the ID is too small relative to the whole image it might not be detected).
...
| Info | ||
|---|---|---|
| ||
See also: |
How do I determine if a person is looking at the screen?
visage|SDK does not have an out-of-the-box option to determine if the person is looking at the screen. However, it should not be too difficult to implement that. What visage|SDK does provide is:
The 3D position of the head with respect to the camera;
The 3D gaze direction vector.
Now, if you also know the size of the screen and the position of the camera with respect to the screen, you can:
Calculate the 3D position of the head with respect to your screen;
Cast a ray (line) from the 3D head position in the direction of the gaze;
Verify if this line intersects the screen.
Please also note that the estimated gaze direction may be a bit unstable (the gaze vectors appearing “shaky”) due to the difficulty of accurately locating the pupils. At the same time, the 3D head pose (head direction) is much more stable. Because people usually turn their heads in the direction in which they are looking, it may also be interesting to use the head pose as the approximation of the direction of gaze.
Here is a code snippet used to roughly calculate screen space gaze by combining data from visage|SDK and external information about screen (in meters) and camera relation which can be used to determine if user is looking at the screen or not (if calculated coordinates are outside the screen range):
| Code Block |
|---|
   // formula to get screen space gaze

    x = faceData->faceTranslation[2] * tan(faceData->faceRotation[1] + faceData->gazeDirection[0] + rOffsetX) / screenWidth; // rOffsetX angle of camera in relation to screen, ideally 0

    y = faceData->faceTranslation[2] * tan(faceData->faceRotation[0] + faceData->gazeDirection[1] + rOffsetY) / screenHeight; // rOffsetY angle of camera in relation to screen, ideally 0

    // apply head and camera offset

    x += -(faceData->faceTranslation[0] + camOffsetX); // camOffsetX in meters from left edge of the screen

y += -(faceData->faceTranslation[1] + camOffsetY); // camOffsetY in meters from top edge of the screen |
| Info | ||
|---|---|---|
| ||
See also: |
Can images of crowds be processed?
visage|SDK can be used to locate and track faces in group/crowd images and also to perform face recognition (identity) and face analysis (age, gender, emotion estimation). Such use requires particular care related to performance issues since there may be many faces to process. Some initial guidelines:
Face tracking is limited to 20 faces (for performance reasons). To locate more faces in the image, use face detection (class
FacialFeaturesDetector).visage|SDK is capable of detecting/tracking faces whose size in the image is at least 5% of the larger resolution i.e. image width in case of landscape images and image height in case of portrait images.
The default setting for the
VisageFeaturesDetectoris to detect faces larger than 10% of the image size and 15% in case of theVisageTracker. The default parameter for minimal face scale needs to be modified to process smaller faces.If you are using high resolution images with many faces, so that each face is smaller than 5% of image width, a custom version of visage|SDK may be discussed.
For optimal performance of algorithms for face recognition and analysis (age, gender, emotion), faces should be at least 100 pixels wide.
From the previous step, you have one FaceData structure for the ID image and one FaceData structure for the live image.
Pass each image with its corresponding FaceData to the function VisageFaceRecognition::extractDescriptor().
...
Pass the two descriptors to the function VisageFaceRecognition::descriptorsSimilarity() to compare the two descriptors to each other and obtain the measure of their similarity. This is a float value between 0 (no similarity) and 1 (perfect similarity).
...
If the similarity is greater than the chosen threshold, consider that the live face matches the ID face.
By choosing the threshold, you control the trade-off between False Positives and False Negatives:
If the threshold is very high, there will be virtually no False Positives, i.e. the system will never declare a correct match when, in reality, the live person is not the person in the ID.
However, with a very high threshold, a False Negative may happen more often - not matching a person who really is the same as in the ID, resulting in an alert that will need to be handled in an appropriate way (probably requiring human intervention).
Conversely, with a very low threshold, such “false alert” will virtually never be raised, but the system may then fail to detect True Negatives - the cases when the live person really does not match the ID.
There is no “correct” threshold because it depends on the priority of a specific application. If the priority is to avoid false alerts, the threshold may be lower; if the priority is to avoid undetected non-matches, then the threshold should be higher.
...
| Code Block |
|---|
331: gVisageRendering.SetTextureImage(LoadImage(@"..\Samples\OpenGL\data\ShowcaseDemo\tiger_texture.png")); |
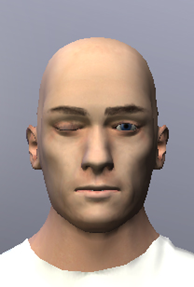
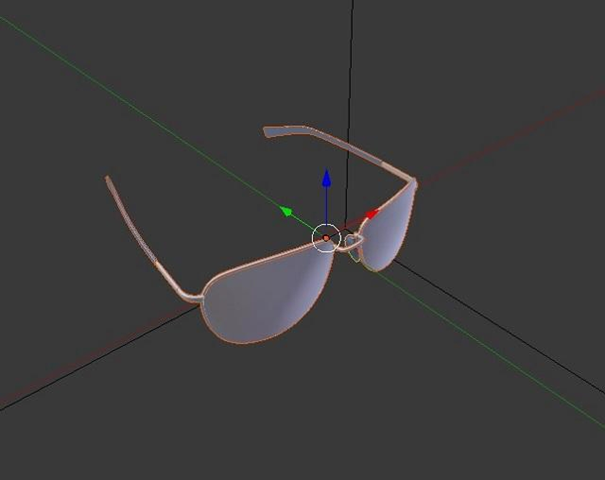
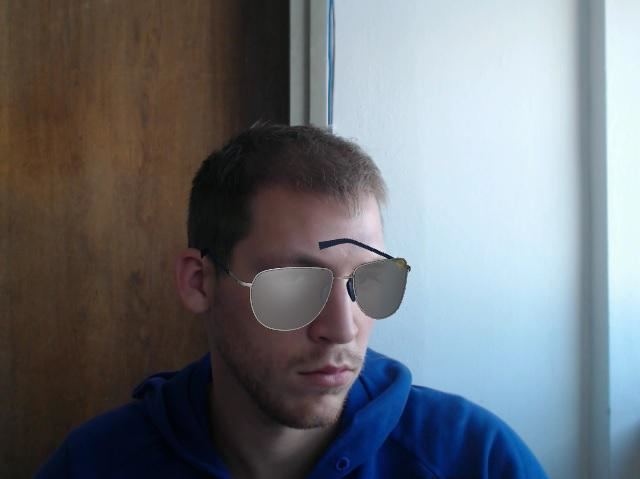
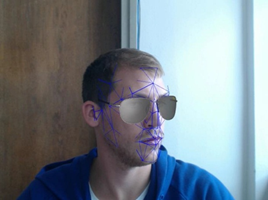
For a sample project based on Unity 3D, see VisageTrackerUnityDemo page. It includes the tiger mask effect and a 3D model (glasses) superimposed on the face. Unity 3D is an extremely powerful game/3D engine that gives you much more choices and freedom in implementing your effects, while starting from the basic ones provided in our project. Furthermore, the “Animation and AR modeling guide” document, available in the Documentation under the link “Resources”, explains how to create and import a 3D model to overlay on the face, which may also be of interest to you.
In VisageTrackerUnityDemo, the tiger face mask effect is achieved using the same principles as in ShowcaseDemo. Details of implementation can be found in Tracker.cs file (located in visageSDK\Samples\Unity\VisageTrackerUnityDemo\Assets\Scripts\ directory) by searching for keyword "tiger".
Troubleshooting
I am using visage|SDK FaceRecognition gallery with a large number of descriptors (100.000+) and it takes 2 minutes to load the gallery. What can I do about it?
visage|SDK FaceRecognition simple gallery implementation was not designed for a use case with a large number of descriptors.
Use API functions that provide raw descriptor output (the function VisageFaceRecognition::extractDescriptor()) and descriptor similarity comparison function (the function VisageFaceRecognition::descriptorsSimilarity()) to implement your own gallery solution in the technology of your choice that is appropriate for your use case.
| Info | ||
|---|---|---|
| ||
See also: |
I want to change the camera resolution in Unity application VisageTrackerDemo. Is this supported and how can I do this?
Depending on the platform, it’s already possible, out of the box.
On Windows and Android, the camera resolution can be changed via Tracker object properties defaultCameraWidth and defaultCameraHeight within the Unity Editor. When the default value -1 is used, the resolution is set to 800 x 600 in the native VisageTrackerUnityPlugin.
On iOS it’s not possible to change the resolution out of the box from the demo application. The camera resolution is hard-coded to 480 x 600 within the native VisageTrackerUnityPlugin.
VisageTrackerUnityPlugin is provided with full source code within the package distribution.
I am getting EntryPointNotFoundException when attempting to run a Unity application in the Editor. Why does my Unity application does not work?
Make sure that you had followed all the steps from the documentation Building and running Unity application.
Verify that the build target and visage|SDK platform match. For example, running visage|SDK for Windows inside the Unity Editor and for a Standalone application will work since both are run on the same platform. Attempting to run visage|SDK for iOS inside the Unity Editor on a MacOS will output an error because iOS architecture does not match MacOS architecture.
Errors concerning 'NSString' or other Foundation classes encountered in client project which includes iOS sample files (VisageRendering.cpp, etc.)?
It is necessary to make sure that VisageRendering.cpp is compiled as an Objective-C++ source, and not as a C++ source by changing 'Type' property of the file on the right-hand property side in the Xcode editor. This applies to any source which includes/imports (directly or indirectly) any Apple classes.
...
...

